How To Dockerize Your Time-Tracking with Kimai
Increase productivity and get organized in minutes by using Kimai and Docker
Introduction
To increase my productivity, I started recording the time of everything that needs to be done during my studies. I wanted to know how much time I spend on tasks and if changes I make to my regular tasks and routines are impacting me. It was important to me to understand where time goes and how I could manage it better.
I still do this and now I use a time-tracking software called Kimai.
In this simple How-To, I will explain how a local instance of Kimai can be installed using Docker. Additionally, I will show how you can set up a production-ready cloud instance of Kimai on your server or your server cluster (using Docker Swarm Mode)
How To Deploy Locally Using Docker
Prerequisite
Install Docker Desktop (Windows)
You can download Docker Desktop for Windows here and install it just by executing the executable. If you are not allowed to use Docker Desktop you can follow this tutorial about installing Docker on Windows without Docker Desktop.
Afterward, you should consider moving the image store path because it is stored in your user folder in the default configuration.
Move images store path (optionally if you don't want the default path)
1. Check which WSL images you have installed
wsl -l -v
# NAME STATE VERSION
# docker-desktop Running 2
# docker-desktop-data Running 2
2. Export, Unregister, and reimport into a new location (redo for all images)
wsl — export docker-desktop docker-desktop.tar
wsl — unregister docker-desktop
wsl — import docker-desktop X:\NEWLOCATIONHERER\ docker-desktop.tar — version 2
Create Kimai Docker Service
After setting up the prerequisites create a new folder and store this docker-compose.kimai.yml
version: '3.5'
services:
  sqldb:
    image: mysql:5.7
    environment:
      - MYSQL_DATABASE=kimai
      - MYSQL_USER=kimai
      - MYSQL_PASSWORD=kimai
      - MYSQL_ROOT_PASSWORD=kimai
    volumes:
      - ./kimai2_db:/var/lib/mysql
    command: --default-storage-engine innodb
    restart: unless-stopped
  nginx:
    image: tobybatch/nginx-fpm-reverse-proxy
    ports:
      - 8080:80
    volumes:
      - public:/opt/kimai/public:ro
    restart: unless-stopped
    depends_on:
      - kimai
  kimai:
    image: kimai/kimai2:latest
    environment:
      - APP_ENV=prod
      - TRUSTED_HOSTS=localhost
      - ADMINMAIL=medium@knulst.de
      - ADMINPASS=changemeplease
      - DATABASE_URL=mysql://kimai:kimai@sqldb/kimai
      - TRUSTED_HOSTS=nginx,localhost,127.0.0.1
    volumes:
      - public:/opt/kimai/public
    restart: unless-stopped
volumes:
    public:
Adjust personal configuration:
- Change port (I used 8080 for a local instance of Kimai)
 nginx:
    [...]
    ports:
      - 8080:80
[...]- Change Adminmail to your mail (will be the login name)
Run Kimai Service
To run your Kimai instance and start tracking your time, open a Terminal, switch to the folder where the file named docker-compose.kimai.yml is stored, and execute:
docker-compose up -d
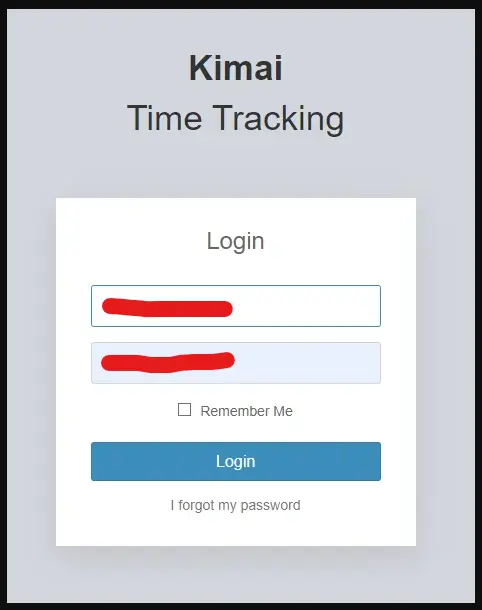
After the command was executing successfully you can open your Kimai time-tracking instance in your preferred web browser and log in with the credentials from the docker file (please change them in your profile)

How To Deploy Online Using Docker
While the prior sections show how to install Kimai locally, I will show two other approaches:
- Deploy on a single server using Docker
- Deploy on a server cluster using Docker in Docker Swarm Mode
Deploy on a server with Docker
If you think about deploying it on a server that is reachable over the internet you should read other tutorials from me:
- Beginner-friendly introduction to DevOps with Docker on Windows
- How To Setup Traefik v2 with Automatic Let’s Encrypt Certificate Resolver
If you are familiar with the topics explained in the tutorials, create this docker-compose file which will be used to run Kimai on a single server with Docker installed:
version: '3.5'

networks:
  traefik-public:
    external: true
  internal:
    external: false

services:
  sqldb:
    image: mysql:5.7
    environment:
      - MYSQL_DATABASE=kimai
      - MYSQL_USER=kimai
      - MYSQL_PASSWORD=kimai
      - MYSQL_ROOT_PASSWORD=kimai
    volumes:
      - ./_data:/var/lib/mysql
    command: --default-storage-engine innodb
    restart: unless-stopped
    networks:
      - internal
    labels:
      - traefik.enable = false

  nginx:
    image: tobybatch/nginx-fpm-reverse-proxy
    volumes:
      - public:/opt/kimai/public:ro
    restart: unless-stopped
    depends_on:
      - kimai
    networks:
     - internal
     - traefik-public
    labels:
      - traefik.enable=true
      - traefik.docker.network=traefik-public
      - traefik.constraint-label=traefik-public
      - traefik.http.routers.kimai2-http.rule=Host(`${KIMAI2_DOMAIN?Variable not set}`)
      - traefik.http.routers.kimai2-http.entrypoints=http
      - traefik.http.routers.kimai2-http.middlewares=https-redirect
      - traefik.http.routers.kimai2-https.rule=Host(`${KIMAI2_DOMAIN?Variable not set}`)
      - traefik.http.routers.kimai2-https.entrypoints=https
      - traefik.http.routers.kimai2-https.tls=true
      - traefik.http.routers.kimai2-https.tls.certresolver=le
      - traefik.http.services.kimai2.loadbalancer.server.port=80

  kimai: # This is the latest FPM image of kimai
    image: kimai/kimai2:latest
    environment:
      - APP_ENV=prod
      - TRUSTED_HOSTS=localhost
      - ADMINMAIL=medium@knulst.de
      - ADMINPASS=changemeplease
      - DATABASE_URL=mysql://kimai:kimai@sqldb/kimai
      - TRUSTED_HOSTS=nginx,localhost,127.0.0.1,${KIMAI2_NGINX_TRUSTED_DOMAIN?Variable not set}
    volumes:
      - public:/opt/kimai/public
      # - var:/opt/kimai/var
      # - ./ldap.conf:/etc/openldap/ldap.conf:z
      # - ./ROOT-CA.pem:/etc/ssl/certs/ROOT-CA.pem:z
    restart: unless-stopped
    networks:
      - internal
    labels:
      - traefik.enable = false

  postfix:
    image: catatnight/postfix:latest
    environment:
      maildomain: neontribe.co.uk
      smtp_user: kimai:kimai
    restart: unless-stopped
    networks:
      - internal
    labels:
      - traefik.enable = false
volumes:
    public:
Adjustments:
1. Export environment variables that will be used while starting the docker containers
export PRIMARY_DOMAIN=knulst.de
export KIMAI2_DOMAIN=kimai.$PRIMARY_DOMAIN
export KIMAI2_NGINX_TRUSTED_DOMAIN=$PRIMARY_DOMAIN
Run it:
docker-compose up -dOpen your domain (KIMAI2_DOMAIN), login (use your credentials), and start using Kimai time-tracking!
Deploy in a cluster (Docker in Docker Swarm Mode)
If you think about deploying it on a server cluster you can use Docker Swarm Mode. I have written two simple How-Tos about Docker Swarm Mode which will explain how to create a production-ready Docker Swarm cluster:
If you have set up your Docker Swarm, use this docker-compose file for deploying Kimai time-tracking software in a Docker Swarm using a Traefik Proxy.
version: '3.5'

services:
  sqldb:
    image: mysql:5.7
    environment:
      - MYSQL_DATABASE=kimai
      - MYSQL_USER=kimai
      - MYSQL_PASSWORD=kimai
      - MYSQL_ROOT_PASSWORD=kimai
    volumes:
      - db:/var/lib/mysql
    command: --default-storage-engine innodb
    restart: unless-stopped
    networks:
      - internal
    deploy:
      placement:
        constraints:
          - node.hostname == YOUR_NODE_HOSTNAME_HERE
  nginx:
    image: tobybatch/nginx-fpm-reverse-proxy
    volumes:
      - public:/opt/kimai/public:ro
    restart: unless-stopped
    depends_on:
      - kimai
    healthcheck:
      test: curl --fail http://localhost || exit 1
      interval: 60s
      retries: 5
      start_period: 20s
      timeout: 10s
    networks:
      - internal
      - traefik-public
    deploy:
      placement:
        constraints:
          - node.hostname == YOUR_NODE_HOSTNAME_HERE
      labels:
        - traefik.enable=true
        - traefik.docker.network=traefik-public
        - traefik.constraint-label=traefik-public
        - traefik.http.routers.kimai2-http.rule=Host(`${KIMAI2_DOMAIN?Variable not set}`)
        - traefik.http.routers.kimai2-http.entrypoints=http
        - traefik.http.routers.kimai2-http.middlewares=https-redirect
        - traefik.http.routers.kimai2-https.rule=Host(`${KIMAI2_DOMAIN?Variable not set}`)
        - traefik.http.routers.kimai2-https.entrypoints=https
        - traefik.http.routers.kimai2-https.tls=true
        - traefik.http.routers.kimai2-https.tls.certresolver=le
        - traefik.http.services.kimai2.loadbalancer.server.port=80

  kimai: # This is the latest FPM image of kimai
    image: kimai/kimai2:latest
    environment:
      - APP_ENV=prod
      - ADMINMAIL=medium@knulst.de
      - ADMINPASS=changemeplease
      - DATABASE_URL=mysql://kimai:kimai@sqldb/kimai
      - TRUSTED_HOSTS=nginx,localhost,127.0.0.1,${KIMAI2_NGINX_TRUSTED_DOMAIN?Variable not set}
    volumes:
      - public:/opt/kimai/public
    restart: unless-stopped
    networks:
      - internal
    deploy:
      placement:
        constraints:
          - node.hostname == YOUR_NODE_HOSTNAME_HERE

  postfix:
    image: catatnight/postfix:latest
    environment:
      maildomain: neontribe.co.uk
      smtp_user: kimai:kimai
    restart: unless-stopped
    networks:
      - internal
volumes:
    public:
        driver: local
    db:
        driver: local
networks:
    traefik-public:
        external: true
    internal:
        external: false
Adjustments:
- Replace
YOUR_NODE_HOSTNAME_HEREwith your Worker Node Hostname in your Swarm - Export environment variables that will be used while deploying
export PRIMARY_DOMAIN=knulst.de
export KIMAI2_DOMAIN=kimai.$PRIMARY_DOMAIN
export KIMAI2_NGINX_TRUSTED_DOMAIN=$PRIMARY_DOMAIN
Deploy it:
docker stack deploy -c docker-compose.kimai-swarm.yml kimaiAfter some seconds your Kimai time-tracking instance should run and you can access it by opening the provided domain (KIMAI2_DOMAIN). To log in, use your credentials from the Compose file.
Closing Notes
In this simple tutorial, I showed how everybody can use Kimai time-tracking software locally or on their server. Additionally, I provided files that are usable without changing anything. They should work for your local or production server instance.
I hope you can easily follow the guide.
What do you think about Kimai? Can it really optimize time management and productivity? Are you eager to deploy it? Also, do you have any questions regarding how to deploy it? I would love to hear your thoughts and answer your questions. Please share everything in the comments.
Feel free to connect with me on Medium, LinkedIn, Twitter, and GitHub.
Thank you for reading, and happy Dockering!
🙌 Support this content
If you like this content, please consider supporting me. You can share it on social media, buy me a coffee, or become a paid member. Any support helps.
See the contribute page for all (free or paid) ways to say thank you!
Thanks! 🥰


