
Ensure Android Code Quality: Use ktlint in your Kotlin Projects
Enhance Kotlin code quality and speed up the development process in Android App Development
Introduction
Kotlin is the primary language recommended by Google for Android app development. Compared to Java, it will make the life of Android app developers easier, but if you are new in this field, you may not know how to format your code correctly.
Instead of starting researching and learning specific rules to write clean code using Kotlin, you can use ktlint, which was developed for this particular purpose:
ktlint is an anti-bikeshedding Kotlin linter with a built-in format
- ktlint
This means it checks the code styling and helps to format the code by making automatic changes. This will result in more readable and understandable code.
Benefits of using ktlint:
- ktlint can save time
- ktlint will save energy by avoiding checking code styling manually
- ktlint simplifies the formatting process
What can ktlint do?
ktlint can be broken down into two main tasks:
- ktlint is a linting tool: Linting done by ktlint is based on the official Kotlin standard style guide. This means it will validate the code and check if it adheres to the official Kotlin style guides.
- ktlint is a formatter: If issues are found in the code by using ktlint, it is possible to run the ktlint formatted to automatically fix these issues.
Also, ktlint can be installed and used in two separate ways:
- As a Gradle Task using ktlint-gradle. This task can also be used in CI/CD pipelines or pre-commit/pre-push hooks to automatically check and fix your code.
- As an Android Studio plugin to enable automatic IDE integration on your development machine.
How to implement ktlint-gradle in a Kotlin Android project
To implement ktlint in any Android app, it will be added to the project using the ktlint-gradle plugin. This is a separate third-party plugin on top of the basic ktlint tool. It will enable working with ktlint by providing Gradle tasks that internally run ktlint commands.
Add ktlint-gradle to an Android Project
To enable ktlint in an Android project, the Gradle plugin has to be added to the root-level build.gradle file:
plugins {
  id("org.jlleitschuh.gradle.ktlint") version "11.1.0"
}

repositories {
  // Required to download KtLint
  mavenCentral()
}
If the Android app uses the plugin DSL, the Gradle plugin will be added differently:
buildscript {
  repositories {
    maven("https://plugins.gradle.org/m2/")
  }
  dependencies {
    classpath("org.jlleitschuh.gradle:ktlint-gradle:11.1.0")
  }
}

repositories {
  // Required to download KtLint
  mavenCentral()
}

apply(plugin = "org.jlleitschuh.gradle.ktlint")Apply the ktlint-gradle plugin to all Projects
If working with multiple submodules within an Android project, the ktlint-gradle plugin should be added to the allprojects{...} block in the root-level build.gradle file:
// root-level build.gradle
allprojects {
	...
	apply plugin: "org.jlleitschuh.gradle.ktlint"
}
Use ktlint-gradle to check Kotlin code
After setting up the ktlint-gradle plugin, the lint and format tasks are now available in the Android app.
There are two ways to find out which tasks could be run in the app:
- Run
./gradlew tasksin the CLI and find any ktlint task that can be run - Use the Gradle tool in Android Studio to list every available task
To check the code with ktlint, the following command can be either run in the CLI or selected from the Gradle tool:
./gradle ktlintCheckThis command will go through the project and report any error found using the default ktlint-gradle configuration.
Automatically fixing any errors reported by ktlintCheck can be done by executing the following:
./gradle ktlintFormatThis command will attempt to fix every error and report every other error that could not be fixed automatically.
After both commands are executed, your code should be optimized in terms of the Kotlin style guide.
Adjust/Specifying ktlint Rules
Although there are many standard rules applied as default by ktlint, it is possible to modify or specify rules to fit any needs:
- have no newline at the end of a file
- indentation size of 2 (instead of 4)
- disable any rule
To apply these rules, you create a new .editorconfig file in the project root directory and specify everything. ktlint-gradle will use this config every time it runs a code checkup.
The following .editorconfig applies the previously defined rules and specifies that ktlint should ignore the no-wildcard-imports rule:
[*]
indent_size = 2
indent_style = space
insert_final_newline = true


[*.{kt,kts}]
disabled_rules=no-wildcard-imports
Using Android Studio Extension
Instead of manually installing ktlint-gradle and using a Gradle task to execute it, you can use Android Studio to install an unofficial plugin from the JetBrains marketplace: https://plugins.jetbrains.com/plugin/15057-ktlint-unofficial-/
This plugin will be fully integrated into your IDE and will internally use ktlint rules to format your code.
Installing can be done with the Plugins manager of Android Studio. Open the Plugins menu by selecting File -> Settings -> Plugins and search for ktlint:
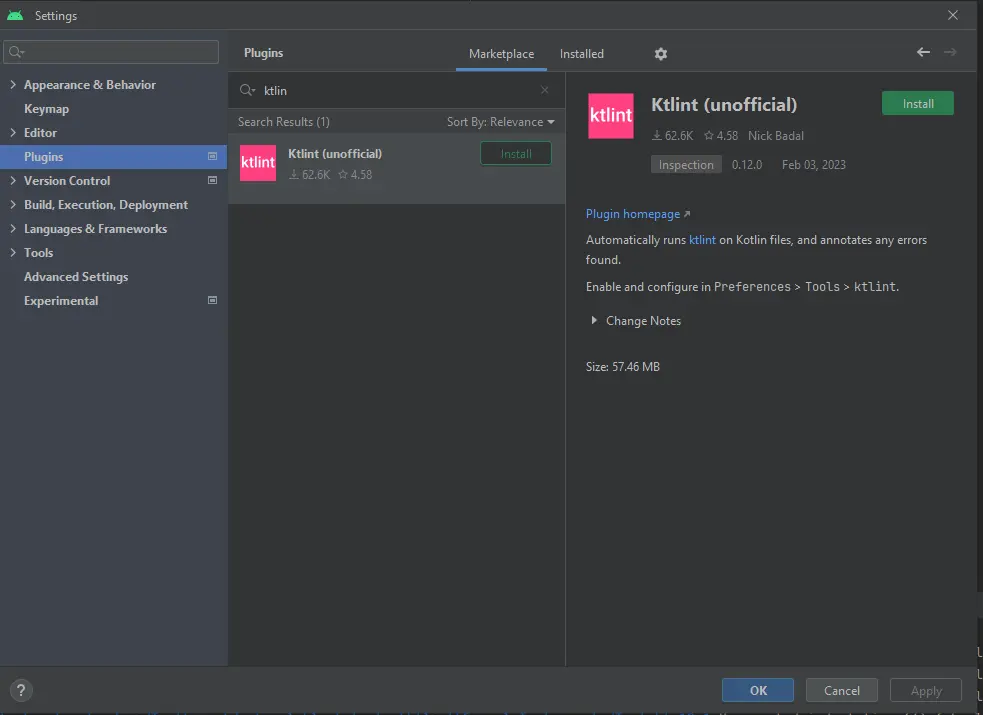
Next, install the plugin, restart your IDE and open File -> Settings -> Tools -> ktlint, and adjust the settings to your needs:
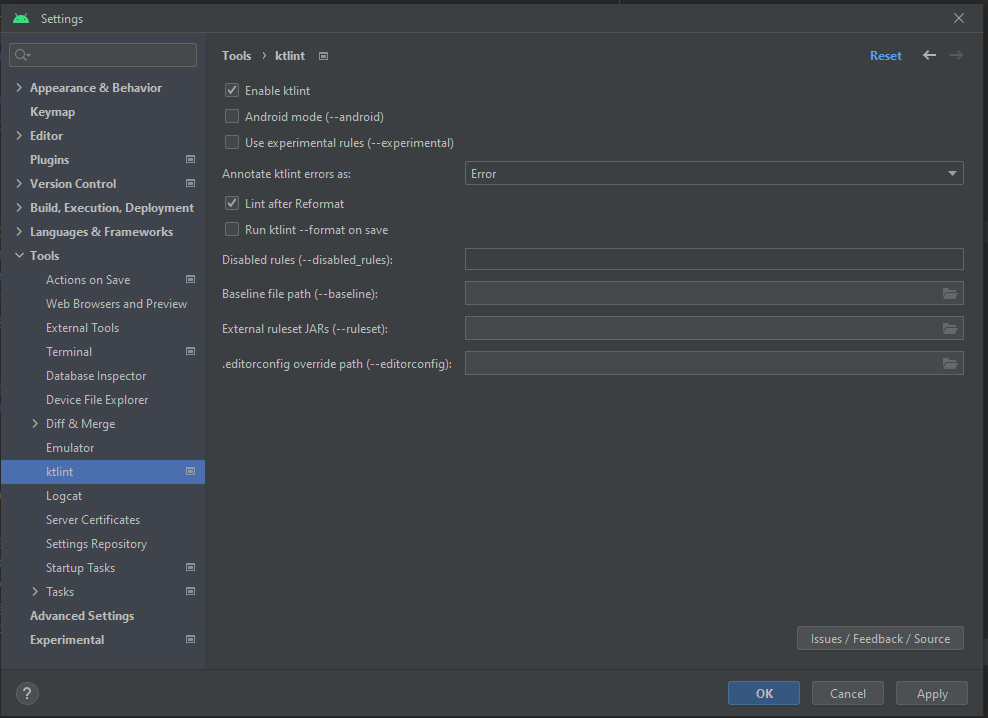
Now if you press CTRL + ALT + L it will automatically format your code and apply all ktlint rules.
Closing Notes
I hope this article has helped show you how to implement ktlint in your Android projects using the Android Studio plugin or the Gradle task and making the most of its features.
Implementing it in Android Studio is straightforward and should be done by every Android app developer to optimize their code quality. Also, using ktlint-gradle as part of your CI/CD pipeline ensures that your code remains compliant with Kotlin coding standards even as your team grows and evolves.
Using ktlint can save time and resources by preventing potential bugs and reducing the time spent on code review. Also, overall code quality will be optimized.
To further optimize overall Android code quality and speed up the app development process, you can check out the following two tutorials:
- Improving Code Quality Of Android Apps With SonarQube And Gradle Detekt
- Optimize Android App Development With Docker, SonarQube, Detekt, and MobSF
Finally, what do you think about ktlint and using it to optimize code quality? Are you eager to apply it to your project? Also, do you have any questions regarding how to implement it? I would love to hear your thoughts and answer your questions. Please share everything in the comments.
Feel free to connect with me on Medium, LinkedIn, Twitter, and GitHub.
Thank you for reading, and happy coding!
🙌 Support this content
If you like this content, please consider supporting me. You can share it on social media, buy me a coffee, or become a paid member. Any support helps.
See the contribute page for all (free or paid) ways to say thank you!
Thanks! 🥰